

Google Calendar – Remote/Phone/In Person Parents Evenings
The past few years have been crazy when it comes to parents evenings right?
We understand how stressful it’s been for headteachers, teachers, office staff and parents to simply book an online or telephone appointment with class teachers.
LOOK NO FURTHER!!!
Introducing Google Calendars Appointment Scheduler feature!
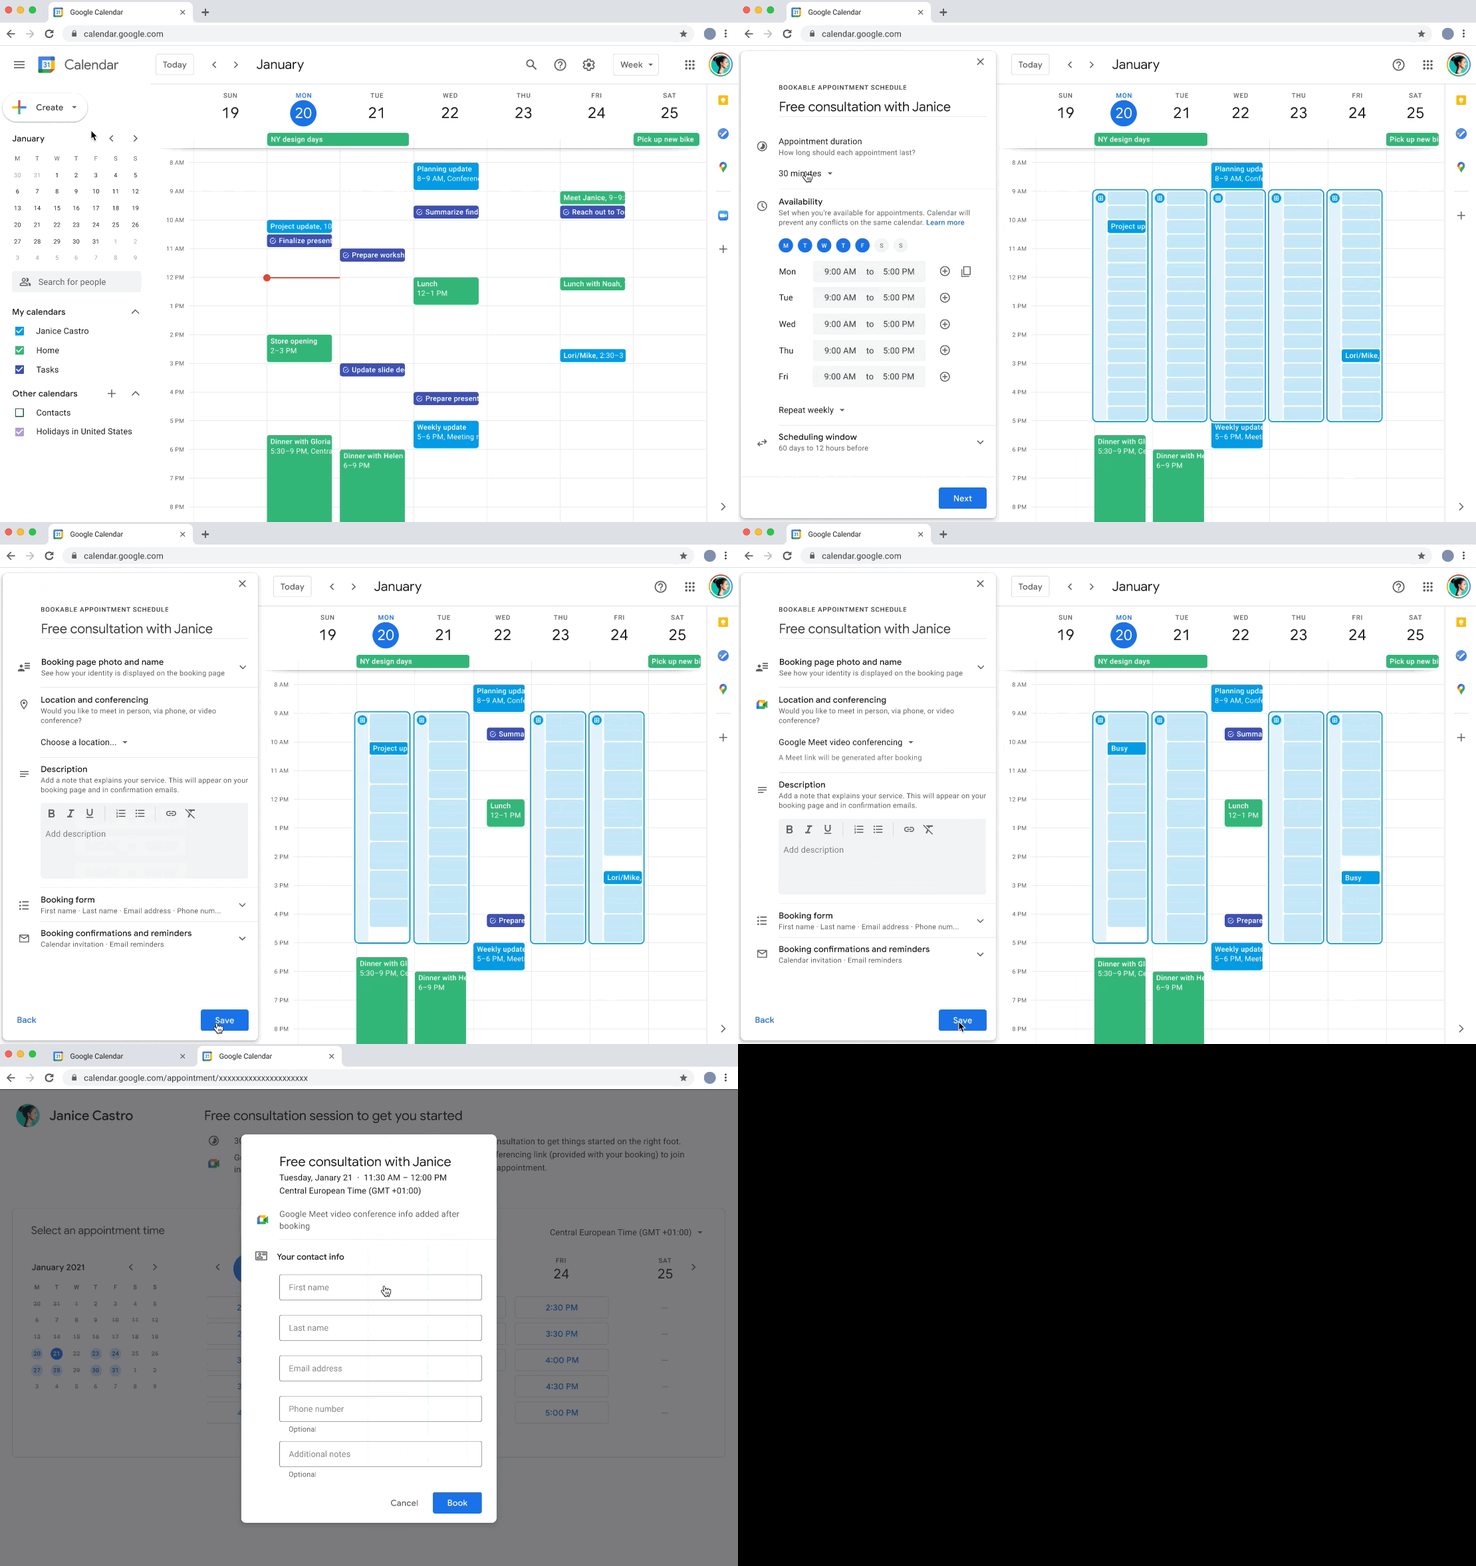
To read more about appointment scheduler from Google directly, please click here
How to Turn on Calendar Scheduling (Google Calendar)
- Naviagte here
- Click Appointment Schedules on the left side
- Tick the box to “Create appointment schedules instead of appointment slots.”
- Go back to your Calendar.
How to Setup a Booking Portal for Parents Evening
- Please ensure you’ve followed the above steps in “How to Turn on Calendar Scheduling (Google Calendar)”
- Go to calendar.google.com
- Click Create
- Click Appointment Schedule
- Enter a Name for your Parents Evening like “Parents Evening with <Class Teacher>” (You don’t need to set this up for each day separately, it can be setup to span across 2 consecutive days)
- Change the Appointment duration to however long you’d like to make each appointment. (Usually 15 minutes is enough)
- Change the “Repeat weekly” setting to Doesn’t repeat (IMPORTANT!)
- Select the first date of the first parents evening day along with the from and to times
- If you want to add another day, click the + button next to the day you’ve just setup (Ensure the times are correct when adding more days)
- Scheduling Window section – If you’re setting up your parents evening slots for the day you’re creating them on and you want parents to book them, you’ll need to ensure you change the “Minimum time before the appointment start that it can be booked” from 12 hours to 3 hours.
- Once you’re happy with all of the above, click Next
- Under Location and Conferencing – Select the option you’d prefer to have (Google Meet, Phone or In Person) – Please note, this can’t be changed later in bulk.
- Under Description, add one if you’d like (No need if not necessary)
- Under Booking Form, feel free to Add a new custom item if you’d like so parents would need to fill in the name of their child. (No need if you’d rather not do this)
- Once you’re happy with everything, click Save.
- When the item is saved, click the Booking Portal link to see your booking portal (You’d simply need to share that link with parents so they can book appointment slots with you)
If you set it up to use Google Meet, it’ll auto generate the individual Meet links on your calendar for you, you’d just need to jump between them for each appointment.